Showing posts with label scones. Show all posts

Thursday, April 7, 2011

Orange Cranberry Scones and Awards


These scones were meant for last month's aspiring bakers but somehow I forgot about it. I realised my past few posts were all about cakes. Time to break the monotony before I get back to cakes again.
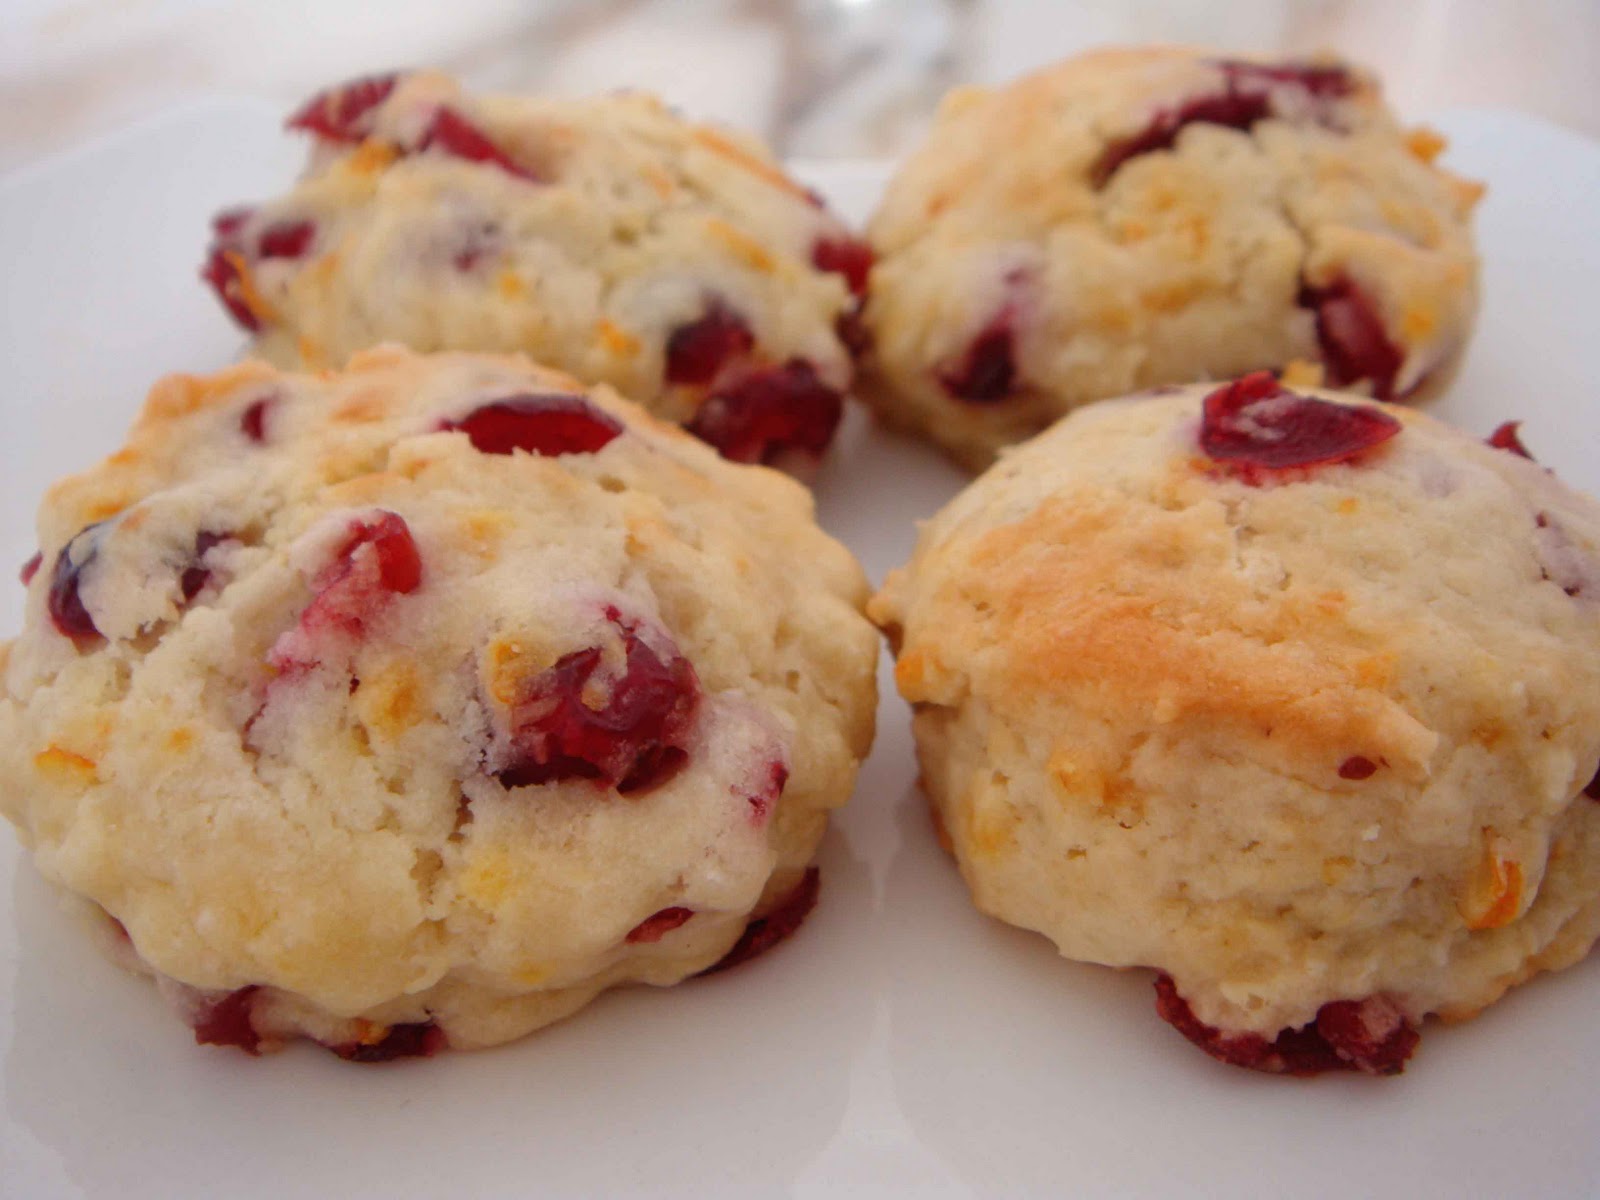

This was my second time baking scones. Compared to my previous cream scones, these orange craneberry scones are less rich and they need a little jam to boost the flavour, despite the fact that I used good quality butter. Perhaps it was due to the absence of salt, which I was lazy to include as I have to open a new pack.


Once again, I am honoured to recieve this lovely blog award from two fellow bloggers, Alice from I Love. I Cook. I Bake and Bake for a Queen. Thank you ladies =]

Here are rules to abide for accepting this award: 
  1. Post linking back to the person that gave you the award.
  2. Share 7 random things about yourself.
  3. Award 15 recently discovered blogs.
  4. Drop them a note and tell them about it.
Ok, here's 7 random things about myself:

1) I used to have a pet Maltese named Ashley staying with me. He's a male! Most people would associate the name with a female. He's now staying with my brother's family.

2) My favourite colour is green. Green used to be the colour theme for my blog when I firsted started blogging. It was a little dull and hence I changed it to the current blue theme which matches my blog layout. I might change it back to Green if I can find a nice green colour.

3) Of all bakes, I enjoy eating cakes the most, followed by cookies and bread. I'm quite a bread person but I always tend to procrastinate when it comes to bread making. Hence I am very stagnant in this aspect.

4) My favourite baking related show is called Cake Boss ( TLC channel) starring Buddy Valastro, his family and his bakery. He's a really talented cake artist and the show is humorous and entertaining. Wish I could make cakes like him one day. The fondant cakes he make are awesome! Imagine a safari theme cake, a 3D standing dog cake and a moving robot cake. Neat!

5) I am quite a bakecook fanatic. Currently I have around 60 titles. The bulk of it are chocolate, cake and cookie titles. Most of the titles are by asian authors. I even have a long wishlist of about 50 books which I would want to have, all of which are by western authors.

6) I think I am addicted to fondant making. I am not quite fond of eating fondant though. Will be adding fondant books to my bakebook wishlist.

7) When the time comes, I would want to go for professional courses to further my baking skills. At the moment, I can only rely on books, blogs, videos and internet articles.

I will be passing the award to the following bloggers: 
  1. Eelin from The Batter Baker
  2. Allie from Sweets and Loves 
  3. Sheryl from Life is too Short, Eat Desserts!
  4. Shirley from Kokken 69
  5. Fatmum from FatmumBaking
  6. Aimei from My Baking Cottage
  7. Josephine from Sugar & Everything Nice
  8. Blessed Homemaker  from Blessed Homemaker
  9. Wendy from Wen's Delight
  10. Jess from J3ss Kitch3n
  11. Jesslyn from Bakericious
  12. Pei-Lin from Dodol & Mochi
  13. Swee San from The Sweet Spot
  14. Wendy from Wendyinkk
 
Orange Cranberry Scones ( recipe adapted from The Art & Soul of Baking by Cindy Mushet)
Serving size: about 12 scones
Texture: Crisp and crumbly on the oustide; fluffy and cake light, moist in the interior. 
Equipment and Materials:
  • Measuring spoon set
  • Flour sift
  • 1.5 inch round cookie cutter
  • Mixing bowl
  • Parchment/baking paper
  • Wire rack
  • Weighing scale
  • Wire whisk
  • Flexible spatula

Dough:
185g plain flour
30g castor sugar
zest of 1 orange
1 tsp + 1/4 tsp baking powder
1/4 tsp baking soda
a pinch of salt
80g unsalted butter, chilled and cubed
60g dried cranberries
homemade buttermilk => 120ml milk  + 1/2tbs lemon juice, (leave to stand for 10 mins)

Making the scones:

Combine dry ingredients - Sift the flour, baking powder and baking soda into a large mixing bowl. Add in the sugar, zests and salt. Use a wire whisk to aerate and disperse the mixture evenly.

Blend in butter - Tip in the cubed butter into the flour mixture. Use your hands and rub the chilled butter into the dry ingredients. The result should be that of fine and coarse flour-coated butter crumbs. Work fast to prevent the butter from melting.

Alternatively, use a pastry cutter or 2 knifes to cut the butter. If using 2 knifes, cut the butter into the flour mixture in a criss cross manner.

A food processor can also be used if you have one. If using a food processor, whisk the dry ingredients together for about 15 seconds. Add in the cubed butter and pulse a few times with 1 second intervals until fine and coarse flour-coated butter crumbs are obtained.

Adding the cream and cranberries - Add in cranberries to the coarse flour-coated butter crumbs and stir to distribute the berries evenly. Pour in the homemade buttermilk into the flour-coated butter crumbs. Use a fork and stir to obtain a moist sticky mixture. 

Shaping and chilling dough - Lightly flour a work surface. Turn out the moist sticky mixture onto the work surface and gently gather the mixture together, pressing in stray dry ingredients into the main dough. There is no need to knead the dough. Wrap the dough in cling film and flatten it to obtain a disk 1 inch in height. Chill in the refrigerator or freeze till it is very firm. Dough must be very firm else it will be difficult to work with.

Prepraring the oven - Meanwhile, preheat the oven to 210 degrees C (recipe asked for 220 degrees C).

Cutting out rounds - Once dough is chilled, turn the flattened disk out onto a floured work surface and cut out rounds using a round cookie cutter dusted with flour. Arrange the cut out rounds 1 inch apart on a baking tray lined with baking parchment. Gather the remaining scraps, flatten them into a disk 1 inch in height and repeat the chilling process. Repeat the cutting of rounds for a second time.

Gather the remaining scraps after the 2nd cutting and flatten them into a round disk 1 inch in height, for a final time. Cut the disk into wedges.

Chill all the cut-out rounds and wedges for another 20minutes or give them a quick freeze to firm them up. If the dough is too soft, it will lose its shape in the oven.

Baking the scones: Bake the scones for 14 -16 minutes or untill the surface is golden brown. Remove to cool on a wire rack.

Notes: 
  1. These Scones taste best when served warm.
  2. Dough can be prepared beforehand and chilled overnight (one night maximum) or frozen for weeks. The dough may not rise as much as when it is freshly made on the same day.
  3. Store remaining scones in an airtight container. Warm them in a toaster or oven before serving.

Notice:

If you wish to post the recipe and instructions online, please give due credit and do re-phrase the instructions. I have taken quite a bit of effort to construct, edit and type them out. Thank you =]

Saturday, September 11, 2010

The Truth about Scones and Biscuits


Cream Scones have constantly been on my never ending to-bake-list. My first encounter with scones was when I was working part-time as a waiter at a local hotel located at Boat Quay. There were leftover scones after a morning seminar and I took a bite into one, curious to know what scones taste like; something I have never heard of prior to that.

Talking about Scones, I had an arguement with Pei-Lin over it. Well, to be exact, it was'nt really an arguement, it was more like an exchange of ideas. One thing for sure was, we did not fight tooth and nail over it. Afterall, it was just...... scones.


In the American context, Scones are often sweet and served with jam or butter. Biscuits,which are rather similar to scones, are often savoury and are served with gravvy. So, what exactly is the difference between Scones and Biscuits? From what I gathered, Biscuits are just unsweetened versions of Scones and savoury ingredients like cheddar cheese and chives are often added.

When it come to Scones and Biscuits, the rest of the world may not share the same perception as the Americans. In some countries, or according to some people, there is hardly any distinction between Scones and Biscuits. In fact, both of them are known collectively as Scones. Some books even state explicictly that Scones and Biscuits are the same thing. Many a times, I have came across scone recipes in books and other resources whereby the taste is savoury in nature. Strictly speaking, such recipes should be referred to as recipes for Biscuits.


For people who have never heard about Scones, Biscuits would mean a totally different thing. In some parts of the world, Cookies and Biscuits are used interchangeably. In fact, that is what I often associate Biscuits with - Cookies. 

I think thats enough of the discussion with regard to Scones and Biscuits. After going through an almost bakeless week, my library book - The Art & Soul of Baking, was beckoning to me. So there it goes, my first attempt on Scones - Cream Scones.

My scones are lightly browned as I omitted the egg wash (see notes). Initially, I was a little apprehensive about the amount of liquid. However, the recipe turned out really well, producing scones that are crisp and crumbly on the exterior, yet moist, buttery and fluffy on the inside, even though they did not rise much. That was probably due to the overnight chilling of the dough. They were so good that I could eat them on their own without any jam. I am really glad about my discovery of these cream scones.

Happy Homebaker has provided many useful tips on scone making and detailed instructions on her blog. So do drop by and take a look at her lovely scones.

Cream Scones ( recipe adapted from The Art & Soul of Baking by Cindy Mushet)
Serving size: about 16-18 scones
Texture: Crisp and crumbly on the oustide; ultra light,fluffy (almost cake-like) and moist in the exterior, very much similar to the crumbs of a ultra light cake. Taste is buttery and mildly sweet.
Equipment and Materials:
1) Measuring spoon set
2) Flour sift
3) 1 1/12 inch round cookie cutter
4) Mixing bowl
5) Parchment/baking paper
6) Wire rack
7) Weighing scale
8) Wire whisk
9) Flexible spatula

Dough:
260g plain flour
55g castor sugar
2 1/2 tsp baking powder
1/4 tsp salt
120g unsalted butter, chilled and cubed
230ml whipping cream, chilled

Making the scones:
Combine dry ingredients: Sift the flour and baking powder into a large mixing bowl. Add in the sugar and salt. Use a wire whisk to aerate and disperse the mixture evenly.

Blend in butter: Tip in the cubed butter into the flour mixture. Use your hands and rub the chilled butter into the dry ingredients. The result should be that of fine and coarse flour-coated butter crumbs. Work fast to prevent the butter from melting.

Alternatively, use a pastry cutter or 2 knifes to cut the butter. If using 2 knifes, cut the butter into the flour mixture in a criss cross manner.

A food processor can also be used if you have one. If using a food processor, whisk the dry ingredients together for about 15 seconds. Add in the cubed butter and pulse a few times with 1 second intervals until fine and coarse flour-coated butter crumbs are obtained.

Adding the cream: Pour in the cream into the flour-coated butter crumbs. Use a fork and stir to obtain a moist sticky mixture.

Shaping and chilling dough: Lightly flour a work surface. Turn out the moist sticky mixture onto the work surface and gently gather the mixture together, pressing in stray dry ingredients into the main dough. There is no need to knead the dough. Wrap the dough in cling film and flatten it to obtain a disk 1 inch in height. Chill in the refrigerator or freeze till it is very firm. Dough must be very firm else it will be difficult to work with.

Prepraring the oven: Meanwhile, preheat the oven to 210 degrees C (recipe asked for 220 degrees C).

Cutting out rounds: Once chilled, turn the flattened disk out onto a floured work surface and cut out rounds using a round cookie cutter dusted with flour. Arrange the cut out rounds 1 inch apart on a baking tray lined with baking parchment. Gather the remaining scraps, flatten them into a disk 1 inch in height and repeat the chilling process. Repeat the cutting of rounds for a second time.

Gather the final remaining scraps after the 2nd cutting and flatten them into a round disk 1 inch in height, for a final time. Cut the disk into 8 wedges.

Chill all the cut out rounds and wedges for another 20minutes. If the dough is too soft, it will lose its shape in the oven. (That happened to my 2nd batch of scones, they spreaded sideways slightly.)

Baking the scones: Bake the scones for 14 -16 minutes or untill the surface is golden brown. Remove to cool on a wire rack.

Notes:
1) These Scones taste best when served warm.
2) The taste is rich and buttery that it can be eaten by itself.
3) Dough can be prepared beforehand and chilled overnight (one night maximum) or frozen for weeks. The dough may not rise as much as when it is freshly made on the same day.
4) Store remaining scones in an airtight container. Warm them in a toaster or oven before serving.
5) To make Biscuits, omit the sugar and proceed as mentioned above.
6) I omitted the egg wash as it took longer to brown the scones. If you like, brush some egg wash over the scones and sprinkle a little sugar over each scone. Bake until the top is golden brown. Alternatively, brush some cream or milk over the top of each scone and bake till brown.

Instagram link: http://instagram.com/bakertanbakes
Related Posts with Thumbnails