Showing posts with label orange. Show all posts

Tuesday, March 13, 2012

Back to Basics - Orange Butter Cake


After two hectic months of work, it is finally time for a short break. While I recharge myself physically and emotionally so that I may be all ready to take on any challenges or pressures at work, it is also time to revisit my pantry and say Hi to my baking books once again. 

Looking at the few blocks of Président French butter tucked away quietly in my refrigerator, I felt that it was time to whip up a butter cake; something simple yet able to satisfy my sweet palate at the same time.   


Referring to the Sicilian Orange Cake recipe from Almost Bourdain, a fuss free recipe that uses but a few easy to obtain ingredients, the end result was a fluffy and tender butter cake with bursts of bright citrusy flavour from the orange zests used.

I particularly loved the proportion of butter, sugar and eggs formulated in this recipe. When doing most butter cakes, the amount of eggs used is often too much for the volume of creamed butter to hold. This often results in a somewhat curdled mixture which is said to affect the fluffiness of the resulting cake or may cause the cake to be oily.

When I was adding eggs (170g) to the creamed butter ( 250g), the eggs and butter emulsified beautifully without a single trace of separation, making the mixing process a reassuring one. I strongly believe this might be the tipping point before the butter-egg mixture separates should any more eggs be added to the mixture. I will be discussing further on this hypothesis in my upcoming post on banana butter cake.

Orange Butter Cake (recipe slightly adapted from Almost Bourdain)
Serving size: 9 x 5 inch loaf cake, serves about 10 slices.
Taste and texture: Citrusy, fluffy and tender with the right amount of moisture.
Equipment and materials:
  • 9 x 5 inch loaf tin
  • Handheld electric mixer/ Stand electric mixer
  • Spatula
  • Grater
  • Mixing bowls
  • Wire rack
  • flour sieve
  • Weighing scale
  • Baking/ parchment paper
  • Pastry brush for oiling pan

Ingredients:
  • 250g good quality unsalted butter, softened
  • 185g castor sugar
  • 170g whole eggs, at room temperature 
  • 100ml freshly squeezed orange juice
  • finely grated zests of 2 oranges (see instructions below)
  • 250g self raising flour

Making the cake:

Preheat Oven and preparing baking tin - Preheat oven to 180 degrees C. Line a 9 x 5 loaf tin with baking paper.


Rubbing orange zests and sugar - Grate orange zests over castor sugar to catch the orange oil. Using your hands, rub the orange zests and the castor sugar until the flavour is infused into the sugar. The castor sugar will be pale orange in colour. 

Creaming the butter - In a large mixing bowl, cream butter and orange-infused sugar on medium high speed for about 5 minutes until pale and fluffy (as mentioned in how to cream butter).

Adding eggs to creamed butter - Add beaten eggs to creamed butter in 6 additions and mix on medium speed, ensuring each addition is well incorporated before adding the next addition. The batter will become wet as more eggs is added but will slowly firm up when the last portion of eggs are mixed in.

Adding flour mixture and orange juice - Sieve 1/3 of the self raising flour to the egg-butter mixture. Mix on low speed until the last bit of flour is absorbed. Next, add in half the orange juice and continue mixing until the orange juice is incorporated. Repeat the mixing process by sifting another 1/3 portion of self raising flour, followed by the remaining half of the orange juice, lastly followed by sifting in the remaining 1/3 of the self raising flour. Scrape the sides and bottom of the bowl with a spatula to incorporate loose ingredients.

Baking the cake - Pour batter into lined 9 x 5 loaf tin. Bake the batter for 50-60 mins at 180 degrees C. Allow cake to cool in loaf tin for 10 minutes before removing cake from loaf tin. Allow cake to cool completely on a wire rack before storing.

Instagram link: http://instagram.com/bakertanbakes

Monday, June 6, 2011

Carrot Cake with Orange Cream Cheese Frosting


The American Carrot Cake is one cake that I hardly have any encounters with. One reason could be that it is not a staple cake in conventional bakeries and it is more commonly found in western style coffee chains like Starbucks or Coffee Bean. Once, I had a serving of it at a hotel buffet and I was immediately drawn to its spicy taste accompanied with cream cream frosting that is signature of carrot cakes. 

Flipping through and comparing my recipes, I decided that the carrot cake by Rachel Allen is the more authentic one, using a combination of mixed spice, nutmeg and cinnamon. My other recipes had cinnamon as the sole spice ingredient. 


While I was reading and following the instructions, one particular matter caught my attention. The method of mixing is in fact the conventional mix-dry-wet ingredients muffin method. Being cautious, I made sure not to over-mix the ingredients, ensuring that the mixing stops once the dry ingredients were moistened. Apart from the tedious process of grating the carrots, this is one very simple cake to make. To my amazement, the outcome was a fluffy, moist and pleasantly spiced cake with moist plump raisins and chunky walnuts, topped with a refreshing citrusy orange cream cheese frosting. The cream cheese frosting is one delightful icing on the cake, with vanilla added to accentuate the orange flavour. 

Carrot Cake with Cream Cheese Frosting (recipe adapted from Bake from Rachel Allen)
Taste and Texture: Mild-spicy, moist, fluffy and chunky with moist plump raisins and crunchy walnuts.
Serving size: 8-10 slices, Makes a 9 x 5 inch loaf
Equipment and Materials:
  • 9 x 5 inch loaf tin
  • Baking paper
  • Grater
  • Mixing bowls
  • Wire whisk
  • Handheld beater/ stand beater

Ingredients:
  • 110g whole eggs, lightly beaten and at room temperature
  • 150ml vegetable oil
  • 185g brown sugar
  • 280g carrot, finely grated
  • 90g raisins
  • 90g walnuts, chopped
  • 190g self-raising flour
  • a pinch of salt
  • 1/2 tsp baking soda
  • 1 tsp cinnamon, ground
  • 1 tsp nutmeg, freshly grated (I omitted this)
  • 1 tsp mixed spice

Making the carrot cake:

Prepare loaf tin and oven - Line a loaf tin with baking paper and preheat oven to 180 degrees C. 

Mixing dry ingredients - Sift flour, salt, baking soda, cinnamon, nutmeg and mixed spice into a large mixing bowl. Use a wire whisk to whisk the mixture until it is evenly distributed. 

Preparing wet mixture - In a mixing bowl, add  in the eggs, oil, sugar, grated carrot, raisins and chopped walnuts and mix well with a large spoon. 

Adding dry ingredients to wet mixture - Add dry ingredients to wet mixture and very gently stir the mixture with a spoon until dry ingredients are moistened (the last bit of dry ingredients disappear). Batter will be very watery. 

Baking the cake - Pour prepared batter into prepared loaf tin and bake for 1 hour at 180degrees C, or until a cake tester/ wooden skewer comes out clean when inserted in the middle. Allow cake to cool in the loaf tin for 15 minutes before removing to cool completely on a wire rack. 

Orange cream cheese frosting:
  • 250g cream cheese, softened
  • 50g unsalted butter, softened
  • 1 tsp vanilla extract
  • 100g icing sugar ( add more if desired)
  • Finely grated zest of 1 orange

Making cream cheese frosting:

In a mixing bowl, beat the cream cheese and butter to combine. Beat in icing sugar until it is incorporated and mixture is smooth. Lastly, add in the vanilla extract and orange zest beat well to obtain a smooth frosting. Spread cream cheese frosting over the top of the carrot cake. 

Notes:
  1. Add more icing sugar to stiffen the frosting or add some milk/orange juice to thin out the frosting according to desired consistency. 
  2. You can omit the raisins and use chopped pecans instead for a nutty carrot cake.

    Thursday, April 7, 2011

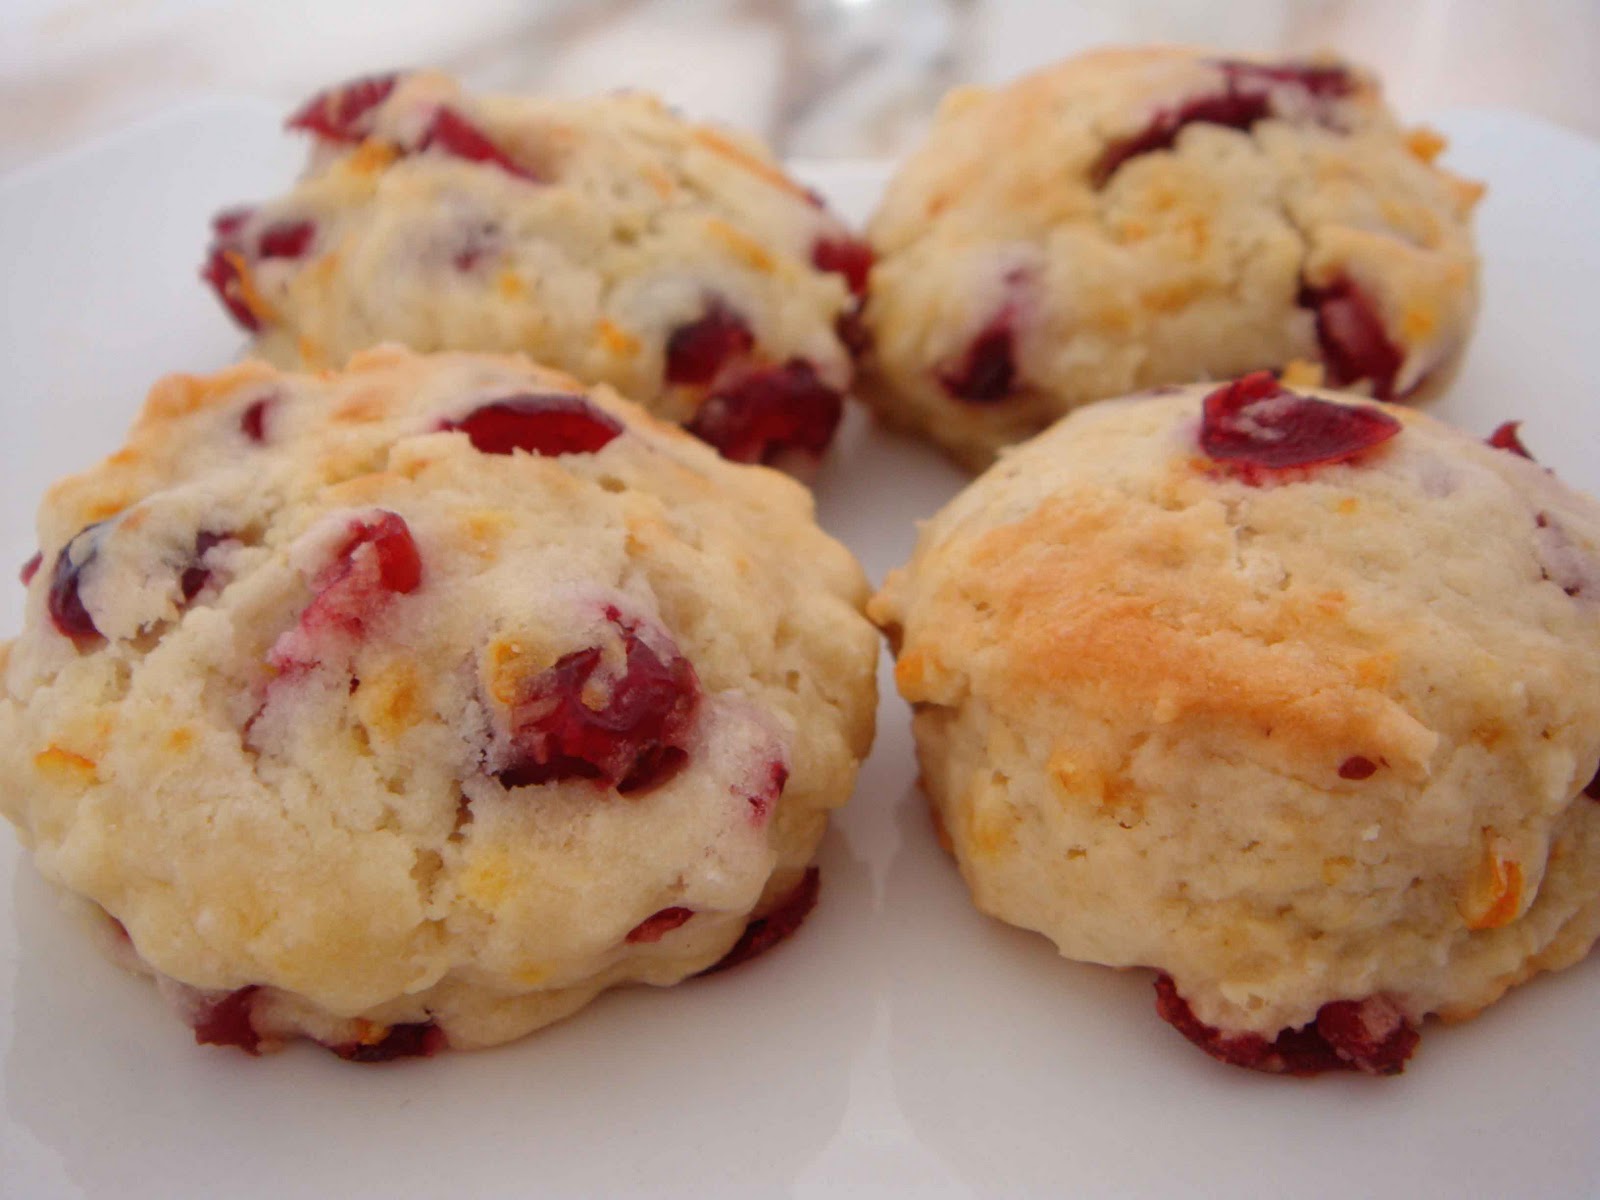
    Orange Cranberry Scones and Awards


    These scones were meant for last month's aspiring bakers but somehow I forgot about it. I realised my past few posts were all about cakes. Time to break the monotony before I get back to cakes again.


    This was my second time baking scones. Compared to my previous cream scones, these orange craneberry scones are less rich and they need a little jam to boost the flavour, despite the fact that I used good quality butter. Perhaps it was due to the absence of salt, which I was lazy to include as I have to open a new pack.


    Once again, I am honoured to recieve this lovely blog award from two fellow bloggers, Alice from I Love. I Cook. I Bake and Bake for a Queen. Thank you ladies =]

    Here are rules to abide for accepting this award: 
    1. Post linking back to the person that gave you the award.
    2. Share 7 random things about yourself.
    3. Award 15 recently discovered blogs.
    4. Drop them a note and tell them about it.
    Ok, here's 7 random things about myself:

    1) I used to have a pet Maltese named Ashley staying with me. He's a male! Most people would associate the name with a female. He's now staying with my brother's family.

    2) My favourite colour is green. Green used to be the colour theme for my blog when I firsted started blogging. It was a little dull and hence I changed it to the current blue theme which matches my blog layout. I might change it back to Green if I can find a nice green colour.

    3) Of all bakes, I enjoy eating cakes the most, followed by cookies and bread. I'm quite a bread person but I always tend to procrastinate when it comes to bread making. Hence I am very stagnant in this aspect.

    4) My favourite baking related show is called Cake Boss ( TLC channel) starring Buddy Valastro, his family and his bakery. He's a really talented cake artist and the show is humorous and entertaining. Wish I could make cakes like him one day. The fondant cakes he make are awesome! Imagine a safari theme cake, a 3D standing dog cake and a moving robot cake. Neat!

    5) I am quite a bakecook fanatic. Currently I have around 60 titles. The bulk of it are chocolate, cake and cookie titles. Most of the titles are by asian authors. I even have a long wishlist of about 50 books which I would want to have, all of which are by western authors.

    6) I think I am addicted to fondant making. I am not quite fond of eating fondant though. Will be adding fondant books to my bakebook wishlist.

    7) When the time comes, I would want to go for professional courses to further my baking skills. At the moment, I can only rely on books, blogs, videos and internet articles.

    I will be passing the award to the following bloggers: 
    1. Eelin from The Batter Baker
    2. Allie from Sweets and Loves 
    3. Sheryl from Life is too Short, Eat Desserts!
    4. Shirley from Kokken 69
    5. Fatmum from FatmumBaking
    6. Aimei from My Baking Cottage
    7. Josephine from Sugar & Everything Nice
    8. Blessed Homemaker  from Blessed Homemaker
    9. Wendy from Wen's Delight
    10. Jess from J3ss Kitch3n
    11. Jesslyn from Bakericious
    12. Pei-Lin from Dodol & Mochi
    13. Swee San from The Sweet Spot
    14. Wendy from Wendyinkk
     
    Orange Cranberry Scones ( recipe adapted from The Art & Soul of Baking by Cindy Mushet)
    Serving size: about 12 scones
    Texture: Crisp and crumbly on the oustide; fluffy and cake light, moist in the interior. 
    Equipment and Materials:
    • Measuring spoon set
    • Flour sift
    • 1.5 inch round cookie cutter
    • Mixing bowl
    • Parchment/baking paper
    • Wire rack
    • Weighing scale
    • Wire whisk
    • Flexible spatula

    Dough:
    185g plain flour
    30g castor sugar
    zest of 1 orange
    1 tsp + 1/4 tsp baking powder
    1/4 tsp baking soda
    a pinch of salt
    80g unsalted butter, chilled and cubed
    60g dried cranberries
    homemade buttermilk => 120ml milk  + 1/2tbs lemon juice, (leave to stand for 10 mins)

    Making the scones:

    Combine dry ingredients - Sift the flour, baking powder and baking soda into a large mixing bowl. Add in the sugar, zests and salt. Use a wire whisk to aerate and disperse the mixture evenly.

    Blend in butter - Tip in the cubed butter into the flour mixture. Use your hands and rub the chilled butter into the dry ingredients. The result should be that of fine and coarse flour-coated butter crumbs. Work fast to prevent the butter from melting.

    Alternatively, use a pastry cutter or 2 knifes to cut the butter. If using 2 knifes, cut the butter into the flour mixture in a criss cross manner.

    A food processor can also be used if you have one. If using a food processor, whisk the dry ingredients together for about 15 seconds. Add in the cubed butter and pulse a few times with 1 second intervals until fine and coarse flour-coated butter crumbs are obtained.

    Adding the cream and cranberries - Add in cranberries to the coarse flour-coated butter crumbs and stir to distribute the berries evenly. Pour in the homemade buttermilk into the flour-coated butter crumbs. Use a fork and stir to obtain a moist sticky mixture. 

    Shaping and chilling dough - Lightly flour a work surface. Turn out the moist sticky mixture onto the work surface and gently gather the mixture together, pressing in stray dry ingredients into the main dough. There is no need to knead the dough. Wrap the dough in cling film and flatten it to obtain a disk 1 inch in height. Chill in the refrigerator or freeze till it is very firm. Dough must be very firm else it will be difficult to work with.

    Prepraring the oven - Meanwhile, preheat the oven to 210 degrees C (recipe asked for 220 degrees C).

    Cutting out rounds - Once dough is chilled, turn the flattened disk out onto a floured work surface and cut out rounds using a round cookie cutter dusted with flour. Arrange the cut out rounds 1 inch apart on a baking tray lined with baking parchment. Gather the remaining scraps, flatten them into a disk 1 inch in height and repeat the chilling process. Repeat the cutting of rounds for a second time.

    Gather the remaining scraps after the 2nd cutting and flatten them into a round disk 1 inch in height, for a final time. Cut the disk into wedges.

    Chill all the cut-out rounds and wedges for another 20minutes or give them a quick freeze to firm them up. If the dough is too soft, it will lose its shape in the oven.

    Baking the scones: Bake the scones for 14 -16 minutes or untill the surface is golden brown. Remove to cool on a wire rack.

    Notes: 
    1. These Scones taste best when served warm.
    2. Dough can be prepared beforehand and chilled overnight (one night maximum) or frozen for weeks. The dough may not rise as much as when it is freshly made on the same day.
    3. Store remaining scones in an airtight container. Warm them in a toaster or oven before serving.

    Notice:

    If you wish to post the recipe and instructions online, please give due credit and do re-phrase the instructions. I have taken quite a bit of effort to construct, edit and type them out. Thank you =]

    Thursday, March 3, 2011

    Fruity Goodness - Orange Cranberry Shortbread


    I am counting down as the days pass by. Five days and "It's Time"! In case you're wondering, I am counting down to the release of Stefanie Sun's album and "It's Time" is the name of her long-waited album, which will land in record stores on 8th March, that is if no mishap occurs. While she is seemingly having a good break these past four years, leading her own life and making preparations for this album, I am baking consientiously in the kitchen and burying myself in baking titles with thick covers. 


    In the meanwhile before the arrival of the big day,  I can only hide my excitment and distract myself by churning out sweet goods. Shortbreads are my preferred choice when it comes to cookies. They are firm, crunchy and buttery, all the requirements I would expect from a cookie. Actually, I am really not that picky. Give me a jar of cookies and I will clear it in no time.

    Traditionally, shortbreads are baked in round pans and cut into wedges. However, that will only yield about 10 cookies. Therefore, I prefer to bake my shortbread cookies as icebox cookies, where the cookie dough is being formed into a log, chilled, and then sliced into rounds or squares. If you dislike shaping and cutting out cookies, this is one method you would like to consider. 

    Let the vibrant colours and fruity flavours charm you with this cranberry shortbread. It is a good choice of cookie to pass to your loved ones and brighten their day up. Just make sure you use a decent brand of butter to impart a nice fragrance to the cookies.

    I will be submitting this entry to this month's Aspiring Bakers # 5 - Fruity March hosted by Jess from Bakerious.

    Orange Cranberry Shortbread (recipe adapted from Honey & Jam)
    Serving size: 40 - 50 cookies
    Taste and texture: Crunchy-crumbly.
    Equipment and materials:
    1) Stand electric beater/ handheld electric beater or wooden spoon
    2) Flour sieve
    3) Measuring spoon set
    4) Spatula
    5) Mixing bowls
    6) Wire rack
    7) Baking trays/ cookie sheets
    8) Baking / parchment paper
    9) Grater/ zester

    Ingredients:
    205g unsalted butter, softened at room temperature
    105g icing sugar
    finely grated zests of 2 oranges
    90g chopped dried cranberries
    270g plain flour
    1/4 tsp baking powder
    a pinch of salt

    Making the Cookies:
    Preheat oven - Preheat oven to 180 degrees C.

    Mix dry ingredients - Sift flour, baking powder and salt into a mixing bowl. Stir with a balloon whisk to distribute them evenly.

    Cream butter - Beat the butter, icing sugar and orange zests on medium speed for 2 minutes until butter mixture is fluffy. The butter need not be as well-creamed as that for making cakes.

    Making the cookie dough - Stir in flour mixture and beat on low speed to combine butter mixture and flour briefly. Stop once the dough starts to comes together. Scrape and fold in any stray flour with a spatula. Next, fold in the chopped cranberries.

    Divde dough into two equal portions. Place dough onto baking/parchment paper and roll the dough into a 1 inch (2.5cm) round/square log. Refrigerate or freeze until log is firm. Slice the log into rounds/squares of about 1 cm thickness.

    Baking the cookies - Place rounds onto baking trays lined with baking/parchment paper, leaving some space between each cookie. Preheat oven to 180 degrees C and bake for 15 - 20 minutes. Once done, the cookies should be firm to the touch and will firm up further upon cooling. Leave cookies to cool completely on a wire rack before storing in air-tight containers.

    Notes:
    1) If cookies do not firm up well after cooling. It means they are underbaked. Fret not. Simply return the cookies to the oven and bake for another 7-10 minutes, then allow to cool.
    2) When cookies are cooled, pressing into the cookies will not yield any dents/ imprints.
    3) Use good butter to impart good flavour to the cookies.
    4) Do a test batch of 3 or 4 cookies to test the baking time.

    Instagram link: http://instagram.com/bakertanbakes

    Thursday, February 24, 2011

    Love at first Sight, Friendship and a Chocolate Layer Cake with Orange Cream Cheese Frosting

    She walked into my life in year 2000. Back then, I was having my December holidays and was waiting for my admission to Junior College. This girl spotted short black hair and she had the most vibrant smile that even the sun pales in comparision. It was love at first sight... Ten years have passed and she still holds a very special place in my heart. She loves music. In fact, she makes music. Her name is Stefanie Sun, an extraodinary girl who made a difference in my life and many others.

    It has been a long wait and it is nearly 4 years since her last album. These 4 years seem like eternity... Now, she is finally back, with a upcoming brand new album which I am eagerly anticipating and I am sure that goes for her other fans out too. When her first hit single made its maiden debut on our local radio station, I could feel the nostalgia. It was a sense of familiarity. How I missed the times back then, when I would rush down to record stores to check if her albums has hit the shelves on the very first day of album release.

    She is a good company and a great role model throughout all these years. I love her unpretentious attitude, her thoughtfulness, her kind-heartedness and her strength. Needless to say, I am infatuated with her music, her songs, and just everything about her. Thanks to her, I met a bunch of worthy, loyal and supportive friends over the years. We had our share of joy and sorrow, and shared memories we would foolishly laugh at upon recollection.


    The bunch of us gathered for our usual Chinese New Year steamboat at J's place. I am not quite a fan of steamboat generally, but this dinner is one which I always look forward to, filled with endless dose of fun and laughter. I've been offically named 'Grandpa' among the bunch this year, adding another nickname along to my baking persona 'Bakertan'. For the occasion,I baked a chocolate layer cake with orange cream cheese frosting which was meant as a backup cake.

    Originally, I had intended for a tiramisu layer cake. It fell short of expectations as the texture seemed grainy due to the gelatine solution setting prematurely causings lumps to form. Due to a lack of time, I decided to work on a layer cake which involved much less work and I think would at least turn out to be presentable. Hence, the chocolate layer cake with orange cream cheese frosting was born. Nevertheless, I brought both cakes along. This has to be the first time ever that I am doing 2 birthday cakes on the same day for the same person.


    The chocolate layer cake with cream cheese frosting worked out great. If I were to fault it, it would be the height of the chocolate layers, for they are too short for the amount of frosting. With thicker layers, the chocolate cake would be perfect. Thankfully, the tiramisu didn't fare too badly and it wasn't noticeablely grainy.

    I will be making this chocolate layer cake again with taller layers, hence I shall only be sharing the orange cream cheese frosting recipe, which is ridiculously simply and fuss free to put together but yields great results nonetheless. The best part about this frosting is that it has a lot less sugar compared to most frostings.

    Orange Cream Cheese Frosting ( recipe adapted from Chocolate Ephipany from Francois Payard)
    Serving size: enough to frost one 3 layer cake
    Taste and texture: citrusy and creamy
    Equipment and materials:
    1) Handheld/stand  mixer
    2) Mixing bowl
    3) Measuring scale

    Ingredients:
    440g cream cheese, softened
    140g unsalted butter, softened
    100g icing sugar
    3 tbs orange juice (one tbs at a time)
    zest from 2 oranges

    Making the frosting:
    In a mixing bowl, beat cream cheese and butter on medium high speed until it is no longer lumpy. Add in sugar and continue to beat until sugar is combined and mixture is light and fluffy. Next, add in orange juice (by the tablespoon to your desired consistency) and orange zest and continue beating until mixture is well combined.

    Notes:
    1) Cream cheese frosting holds its shape well unrefrigerated.
    2) Flavour can be varied using lemon, calamansi, grapefruit or yuzu instead of orange.
    3) Grate the zest over the frosting to allow the orange oil to seep into the frosting.
    4) Do not omit zest as it is imparts a great deal of citrus flavour.
    5) When using it for any cake, let the frosted cake sit at room temperature for 1 to 2 hours if you have the time, the cake will become really moist. That's what happened to my chocolate cake when I let it sit for a few hours.
    6) Add more icing sugar if required. 

    Sunday, December 19, 2010

    Bakertan's Christmas Goodies - Cornflakes Raisins Chocolate Chip Cookies

    For the entire week, I was holidaying in Bangkok. My itinerary was packed with tons of shopping expedittions and endless visits to tourist hotspots. Needless to say, I ended up with near to a dozen t-shirts. There isn't any baking stuff this time. Seems like baking is a rare sight in Bangkok and bakeries are almost nowhere to be found, except the high-end shopping centres.

    It was a refreshing experience. Me and my friends navigated our way around taking various modes of transport like the skytrain, MRT, tuk-tuk, cabs, water taxis and not to forget the most basic - walking (lots of it). While roaming Bangkok, we were greeted with the many different faces of the city; street hawkers, thai massage parlours, MRT and skytrain stations, highways, traffic congested streets, night markets, pubs, railway slums, river life, buddhist temples, palaces etc.


    Its feel good to be home. The air is clean and I am thankful for the amenitites we have here that make life so much more convenient and comfortable. Sometimes, it takes a short overseas trip to realise that the best place to be is still home - Singapore.

    Since I was away for 6 days, it is a bakeless week. I miss my books and baking gadgets and am eager to get back to what I love most. For now, I shall share a bake that I have made previously for my 1st round of Xmas goodies - Cornflakes Raisins Chocolate Chip Cookies.


    This is the second time I am making these cookies. After I first made them, I thought I won't be making them for awhile. The same thoughts re-surfaced after I baked them a second time. I have to admit that I love the results that the cookies offer, but dread going through the process of making them. Making 60 of these cookies took me more than 3 hours alone and most of the preparation goes into shaping the cookies.

    The efforts are well worth it. The first time I made these, my elder brother and sister-in-law were full of praises for it. This time round, my mum and younger brother loved them to bits. The toasted cornflake exterior pairs off really well with the orange flavoured chocolate chip filled interior, giving a light yet refreshing taste. Do a favour for youself by saving some cookies after baking them, before you regret that the cookie jar is emptied in no time.

    Cornflakes Raisins Chocolate Chip Cookies ( recipe adapted from Crazy for Chocolate by Periplus)
    Serving size: 60 cookies
    Taste and texture: Crunchy-chewy.
    Equipment and materials:
    1) Stand electric beater/ handheld electric beater or wooden spoon
    2) Flour sieve
    3) Measuring spoon set
    4) Spatula
    5) Mixing bowls
    6) Wire rack
    7) Grater
    8) Baking trays/ cookie sheets
    9) Baking / parchment paper

    Ingredients:
    2 tsp grated orange zest
    200g unsalted butter, softened (I recommend reducing this to 160g)
    160g castor sugar
    2 eggs, lightly beaten
    250g self-raising flour
    100g semi sweet chocolate chips
    100g sultanas
    200g cornflakes, lightly crushed

    Making the Cookies:
    Preparing the zest: Finely grate the zest of a large orange or two small oranges over the sugar. This will allow the sugar to catch some of the orange oil. Rub the sugar with the zest well to infuse the flavour of the orange oil and the sugar. The sugar will become moist and will be tinted orange.

    Creaming the  butter and adding eggs: In a mixing bowl, beat the butter and sugar on medium speed for 2 minutes until butter mixture is pale and fluffy. Add in eggs one after the other, beating the mixture well before the next is added.

    Adding flour: Sift in self-raising flour and beat on low speed to combine butter-egg mixture and flour briefly. Stop once the dough starts to comes together. Scrape and fold in any stray flour with a spatula.

    Folding in raisings and chocolate chips: Combine the raisins and chocolate chips and distribute them evenly.Gently fold them into the cookie dough.

    Shaping the cookie dough: Refrigerate the dough for 30 minutes to firm it up.  Scoop rounded teaspoons (slightly heaped) of dough and shape them into balls. Coat them with crushed cornflakes. Place coated cookie doughs on lined cookie trays/sheets and leave some space between each dough to allow for expansion. Bake the cookies at 180 degrees C for 15-20 mins, until the dough turns golden.

    About 10 minutes into baking, the cookies would have expanded and will become sparse/bald as a result. Lightly cover the surface with crushed cornflakes and return them to the oven. Nevermind if they make a mess on the tray.

    Cooling and storing baked cookies: Allow cookies to cool completely on a wire rack before storing them in airt-tight jars.

    Notes:
    1) If cookies soften after storage, bake/toast them for a couple of minutes to re-crisp them.
    2) Vary baking time to get desired texture. A short baking time will result in a slightly cakey/chewy interior. Longer baking times will result in a full crispy interior.
    3) Confirm the baking time by making a test batch of 2-3 cookie dough as the oven temperature and baking time varies from model to model. Once you are satisfied with the texture, use the same baking time for the rest of the cookie dough.
    4) Half the recipe to get yield a smaller batch of cookies.
    5) The dough is really soft. Refrigeration will make the dough easier to handle and shape.

    Saturday, January 10, 2009

    Orange and Lime Cheesecake

    DSC00730

    I am starting to get addicted to cheesecakes. This was one that I made for last year's Xmas gathering. I am particularly satisfied with this cheesecake. My very first attempt on this recipe turned out good in terms of taste and appearance. It was dense yet creamy enough in texture and the taste was that of combined citrus and condensed milk.

    The fun part was preparing and decorating top of the cake. For this cake, i used candied lime and orange zest. After experimenting and twisting the slices, I managed to come up with a simple yet elegant decoration. That sure gave me a great sense of satisfaction. Haha, I felt pro for a moment then.

    Orange and Lime Cheesecake (recipe adapted from Fresh and Tasty Biscuits and Cakes)
    Serving size: 8 -10 slices
    Equipment and materials:
    1) Stand electric beater/ handheld electric beater
    2) Food processor/ rolling pin
    3) Measuring spoon set
    4) Spatula
    5) Mixing bowls
    6) Wire rack
    7) 18cm (7 inch) springform tin
    8) Baking tray larger than springform tin
    9) Aluminium foil

    Biscuit base:
    110g digestive biscuits finely crushed
    50g melted butter
    1 Tbsp brown sugar

    Cheesecake filling:
    250g cream cheese, softened
    2 1/2 tbs brown sugar
    2 tsp finely grated orange zest
    2 tsp finely grated lime zest (I used australian lime)
    4 tsp orange juice, strained
    4 tsp lime juice, strained
    1 egg, lightly beaten
    150ml condensed milk
    2 1/2 tbs whipping cream

    Method:
    1) Prepare biscuit base as mentioned in Preparing a Cheesecake Tin. Freeze prepared base for 10 minutes or until ready for use.
    2) Preheat oven to 160 degrees C.
    4) Place cream cheese, sugar,the zests and juices and beat until creamy. Add in the egg and mix until just combined.
    5) Lastly, add in condensed milk then and fold in the cream until well combined.
    6) Pour cheesecake filling onto prepared biscuit base.
    7) Wrap top and sides of spring form tin with aluminium foil as mentioned in Preparing a Cheesecake Tin. Bake at 160 degrees C for 45 minutes in a water bath.
    8) When baked, allow cheesecake to cool in the oven with oven door ajar for 30 minutes.
    9) Remove the tin from the oven and allow to cool on a wire rack.
    10) Place cooled cheesecake tin in the refrigerator and chill for 4-6 hours. Dislodge cheesecake from cheesecake tin.

    Note:
    1) To slice cheesecake nicely, wipe the knife after each slice with kitchen towel/s.
    2) To smooth the sides of the cheesecake, dip a knife in hot water. Wipe the knife dry and run it around the perimeter of the cheesecake. Repeat the step if necessary.
    Related Posts with Thumbnails