Showing posts with label ganache. Show all posts

Monday, March 21, 2011

Saving a dry chocolate cake - Apricot Sacher Cake

Very often, my chocolate cakes turn out to be dense, dry and crumbly as compared to other kinds of cakes. Perhaps it is the nature of cocoa that accounts for the sturdy structure and an absence of moisture, or it could be how well recipes work out. For me, I believe it is a combination of both factors.

To yield tender chocolate cakes, most recipes ask for a whooping amount of sugar. Having baked for some two and a half years, I am habitually cutting down on sugar on most recipes, as the Asian palate is not accustomed to the level of sweetness that the Americans are used to. This works well most of the time, without compensating much on the texture and moistness. However, it is not advisable to do so for chocolate bakes, since sugar helps to balance the bitterness and intensity of cocoa. Cut down on too much sugar and you will find your chocolate cakes or brownies to be on the bitter and dry side.


Sugar is not the sole tenderizer where baking is concerned. Other ingredients like butter, chemical leaveners, sour cream and yoghurt also help contribute to a tender-crumbed cake. On the other hand, flours and eggs are tougheners. Out of the four basic ingredients - flour, sugar, eggs, butter, we have two tenderizers (weakens structure) versus two tougheners (build structure). 

In a basic pound cake recipe using only the four basic ingredients, there is equal parts of flour, sugar, eggs and butter in weight. The total weight of tenderizers (butter and sugar) is equal to that of the total weight of the tougheners (flour and eggs). Tweak the proportions appropriately and you will get a tender cake. Of course, the mathematics becomes complex when more ingredients come into the picture or when the amount of egg yolks and whites differ.


From experience, I like chocolate cake recipes that use a decent amount of liquid (sourcream, whipping cream, yoghurt, milk, buttermilk). When leavened with the help of beaten egg whites, the resulting texture is much lighter.

Earlier this week, I tried out a chocolate cake recipe and it turned out dissatisfactory being dry and dense, despite the fact that the cake batter was leavened with egg whites. Refusing to let my cake go to waste, I reluctantly followed the instructions and completed it as a Apricot Sacher Cake. The dense cake was sliced into three layers and each layer was brushed with warmed apricot jam. Finally, the three layers were assembled and glazed with chocolate ganache. It sure made a lot of difference with the thin apricot jam layers and the chocolate ganache, adding much depth and flavour to an otherwise dull and boring chocolate cake.

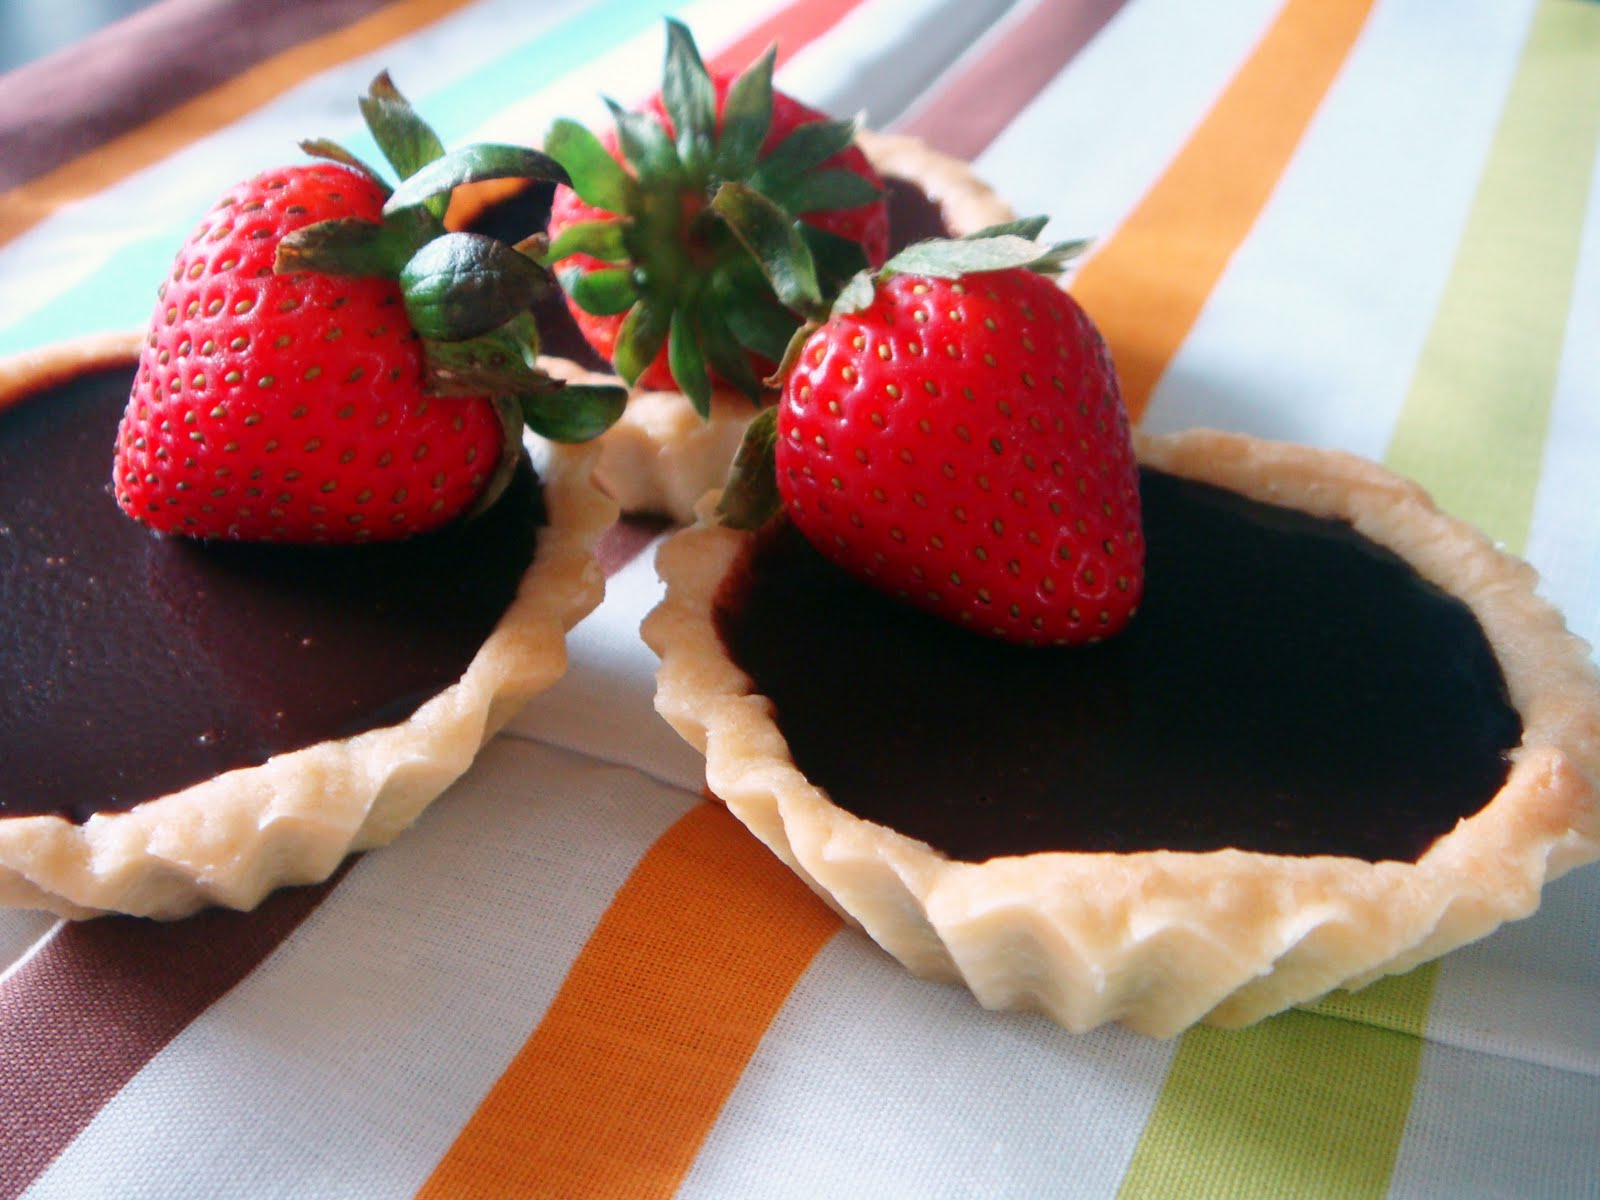
Dark Chocolate Ganache
Taste and texture: Intense, rich, smooth.
Yield: Enough to coat a 8 x 2 inch tall chocolate cake
Equipment and materials:
1) Heatproof bowl
2) Spoon
3) Knife
4) Measuring jug
5) Wire rack
6) Baking paper
7) Spatula

Ingredients:
120ml heavy cream (whipping cream)
120g semisweet (55% cocoa) dark chocolate, finely chopped (use the best quality you can afford)

Method:
Making the Chocolate Ganache - Place 120g finely chopped bittersweet dark chocolate in a heatproof bowl. Place heavy cream in a saucer and heat it until it is almost coming to a boil on medium heat. Turn off the flame and remove the saucer. Pour the cream over the finely chopped dark chocolate and allow chocolate to sit for a while in the heated cream. Stir gently to allow chocolate to melt and blend in with the cream. Do not over-stir or the mixture may become grainy. The smooth cream and dark chocolate mixture is known as a dark chocolate ganache. The chocolate should melt completely if this is properly done (if chocolate is finely chopped)

If dark chocolate is not completely melted - Place the heatproof bowl over a saucepan filled with water. The bowl should fit snugly onto the saucepan and the bottom of the bowl should not be in contact with the water in the saucepan. Bring the water in the saucepan to a low simmer on low heat. This is known as a double-boiler. Stir the chocolate cream mixture gently to obtain a smooth ganache. Do not over-stir or the mixture may become grainy.
 
Coating a cake with ganache:
Place cake on a wire rack over a large sheet of baking paper. Allow chocolate gananche to cool to a pouring consistency. Pour the ganache onto the centre of the cake and use a spatula to help spread the ganache evenly outwards. The ganache should coat the top and sides of the cake completely. Allow ganache to set. It may take several hours.
 
Notes:
1) If the chocolate do not melt completely and there is a need to use a double-boiler, there is a risk that the resulting ganache may be grainy if the heat is not well controlled.
2) Scale recipe up or down to glaze smaller/larger cakes.
3) The purpose of the baking paper below is to prevent a mess. If any part is uncoated, simply scoop and reuse some of the ganache that has dripped onto the baking paper.
4) When cake glazed with ganache is chilled, the ganache will become dull. Use a hair-dryer/blower to blow the surface of the ganache to return the shine.

Tuesday, August 10, 2010

Bakertan's Chocolate Factory - Part II


2 boxes of  rum and raisins dark chocolate truffles. The size of these truffles were smaller compared to the white chocolate matcha truffles.


Rustic, homemade look


I tried to 'temper' the chocolates using the seeding method without a candy thermometer and it did work for a short moment. The chocolate coating was glossy but when it set, it turned dull, probably due to rapid change in temperatures. 


Notice the inconsistency in the colour of the chocolate coating. This is due to the chocolate undergoing extreme change in temperature. The chocolate coating has developed a chocolate bloom.


Plain dark chocolate truffles with dark chocolate ganache centers. These chocolates were made using a simple inexpensive chocolate mould.


Rum and Raisins Truffles / Plain Dark Chocolate Truffles - see notes below (recipe adapted from Chocolate: 70 of the best recipes from Hamlyn)
Serving size: 15 -20 pieces
Equipment and materials:
1) 2 Heatproof bowls
2) Spoon
3) 2 Fork
4) 3/4 inch or 1 inch Melon baller (optional)
5) Measuring spoon set
6) Baking/parchement paper
7) Foil/paper mini cupcake liners
8) Saucer
9) Clingfilm
10) Baking trays
11) Diposable food gloves
12) Knife for chopping chocolate

Ingredients:
50 ml heavy cream (whipping cream)
85g bittersweet (60% cocao) dark chocolate, finely chopped (use the best quality you can afford)
35g raisins finely chopped and soaked in 2 tbsp dark rum for 1 hour, covered  (I used Meyer's dark rum)
1-3 tsp dark rum
120g - 150g dark chocolate pistoles or finely chopped

Method:
Making the Chocolate Ganache: Place 85g of finely chopped bittersweet dark chocolate in a heatproof bowl.  Place heavy cream in a saucer and heat it untill it is almost coming to a boil on medium heat. Turn off the flame and remove the saucer. Pour the cream over the finely chopped dark chocolate and allow chocolate to sit for a while in the heated cream. Stir gently to allow chocolate to melt and blend in with the cream. Do not overstir or the mixture may become grainy. The smooth cream and dark chocolate mixture is known as a dark chocolate ganache.

If dark chocolate is not completely melted: Place the heatproof bowl over a saucepan filled with water. The bowl should fit snugly onto the saucepan and the bottom of the bowl should not be in contact with the water in the saucepan. Bring the water in the saucepan to a low simmer on low heat. This is known as a double boiler. Stir the chocolate cream mixture gently to obtain a smooth ganache. Do not overstir or the mixture may become grainy.

Cooling and flavouring ganache: Remove heatproof bowl from the heat and allow ganache to cool. Add rum soaked raisins to the cooled ganache. Next, add in 1-3 tsp of dark rum to taste. Place a piece of clingfilm over the bowl and press onto the surface of the ganache. Refrigerate ganache untill firm.

Shaping chocolate ganache balls: When ganache is firm, use a 3/4 inch melon baller to scoop out rounded (slightly heaped) portions onto a tray lined with baking paper. Refrigerate these portions for 10 minutes or untill firm. Using the disposable food gloves, roll the chilled portions into round balls. Refrigerate these round balls for another 10 minutes or till firm. Melt remaining 120g dark chocolate in another heatproof bowl using the double boiler method on low heat.

Coating ganache balls with dark chocolate: Using the tines of 2 fork, dipped the round ganache balls into the melted dark chocolate to coat. Lift the dipped ganache ball away from the melted dark chocolate. Rotate and transfer the coated balls at the same time between the 2 fork to ensure ganache balls are well coated all around. Transfer coated ganache balls to a tray lined with baking paper. Allow the dark chocolate coating to set at cool room temperature. Alternatively, refirgerate coated ganache balls untill firm.

Storing chocolate truffles: Line truffles with mini cupcake papers and store truffles in a single layer in the refrigerator for several days. Serve truffles at room temperature, not chilled and directly from the refrigerator.
 
Notes:
1) For Plain Dark Chocolate Truffles, omit the raisins and rum. Follow the above method as stated.

2) For Liqueur Truffles, omit the raisins and rum. Add 1-3 tsp of desired liqueur to taste. (Bailey's is a
good choice)  

3) Chocolate truffles are best eaten at room temperature. When eaten chilled, the chocolate flavour is 'trapped'.

4) It takes some practice to melt dark chocolate. Dark chocolate is easier to melt as compared to white chocolate. The best is to use low heat. If the water in the double boiler comes to a strong boil, the heat may cause the dark chocolate to burn. Burnt dark chocolate is dry and cannot be melted anymore.

5) Do not allow even a drop of water to come into contact with the melted dark chocolate. The dark chocolate will seize and will be unusable. If this happens and you still want to salvage the dark chocolate, add in more water instead and stir constantly. The melted dark chocolate will become smooth but end up being watery, affecting the taste and texture. Use it as a chocolate sauce instead.


Saturday, August 7, 2010

Bakertan's Chocolate Factory: Part 1

Tomorrow will be the Blogger's meetup initiated by Pei-Lin. At the thought of meeting up with other fellow food bloggers, I feel kind of excited. Afterall, this is my first meetup and I always thought it would be great to meet up like-minded people sharing the same passion for food and its preparation.  

Each of us is supposed to bring along one homemade food item for the potluck. I have long decided that I would be doing chocolate truffles. Since everyone knows how to bake and is pretty proficient at it, I decided not to do any baked goods. Cooking is out of the option as I only have that few kitchen tricks up my sleeves, hardly worthy to be brought along for the potluck. Furthermore, a potluck would signify an excess of food. Chocolate truffles are hardly filling and hence would be a good idea for an after-meal dessert.  

The first time I made chocolate truffles was ages ago, dating back to about one and a half years back. Back then, my best friend was leaving Singapore for China on an overseas exchange. Hence, I made some Bailey's chocolate truffles for his farewell. My maiden attempt turned out well. Making Chocolate truffles seems like an easy affair with few ingredients to handle. However, it is time consuming having to chopped chocolates finely, melt the chocolates, make the ganache, refrigerate the ganache, scoop the truffle centers and coat them with chocolate. The weather is definitely not on my side since Singapore is humid and warm all year round. We only have one season here and that is Summer.

In total, I made 3 different flavoured chocolate truffles to bring along to the meetup: green tea white chocolate truffles, rum and raisins truffles and lastly plain dark chocolate truffles. Out of these, the green tea truffles took the longest time to prepare. I started with the green tea truffles first and gained some practice. Making the rum and raisins truffles became much easier afterwards. For the plain chocolate truffles, I used a simple chocolate mould to differentiate them from the rum and raisin truffles, since both are covered with dark chocolate.


Rolled green tea truffles centers


Notice that the truffle is sweating due to condensation.


Green tea truffle speckled with matcha powder. The idea is inspired by this website


Reminds me of mooncakes. Anyway Mid-Autumm will be coming soon..


Truffle centers actually look like pandan lotus paste


I chose 3 of the not so good looking ones and sampled them. Taste is not too shabby. Those who do not like white chocolate probably will not appreciate the sweet milky caramel taste.

Thats all for now regarding tomorrow's  preview. Will take more pictures on the remaining truffles soon....

Green Tea Truffles ( recipe adapted from Truffles: 50 Delicious Decadent Homemade Chocolate Treats by Dede Wilson)
Serving size: 11 pieces
Equipment and materials:
1) 2 Heatproof bowls
2) Spoon
3) 2 Fork
4) 3/4 inch or 1 inch Melon baller (optional)
5) Measuring spoon set
6) Baking/parchement paper
7) Foil/paper mini cupcake liners
8) Saucer
9) Clingfilm
10) Baking trays
11) Diposable food gloves
12) Knife for chopping chocolate

Ingredients:
50 ml heavy cream (whipping cream)
120g white chocolate, finely chopped (use the best quality you can afford)
1/2 to 1 & 1/2 tsp matcha powder
120g white chocolate pistoles or finely chopped
a little matcha powder to sprinkle on green tea truffles

Method:
Making the chocolate ganache: Place 120g of finely chopped white chocolate in a heatproof bowl. Place cream in a saucer and heat it till it is almost coming to a boil on medium heat. Off the flame and remove the saucer. Pour the cream over the finely chopped white chocolate and allow chocolate to sit for a while in the heated cream. Stir gently to allow chocolate to melt and blend in with the cream. When chocolate is blended with cream, the resulting mixture will be cream coloured. The mixture cream chocolate mixture is known as a white chocolate ganache.

If white chocolate is not completely melted: Place heatproof bowl over a saucepan filled with water. The bowl should fit snugly onto the saucepan and the base of the bowl should not be in contact with the water in the saucepan. Bring the water in the saucepan to a low simmer on low heat. This is known as a double boiler. Stir the white chocolate and cream mixture until the white chocolate melts completely to obtain a smooth ganache.

Cooling and flavouring ganache: Remove heatproof bowl from the heat and allow ganache to cool. Add in 1/2 tsp of matcha powder to the cooled ganance. Mix evenly. Add more matcha powder to taste if required. White chocolate is very sweet so strike a balance between the green tea flavour and the milky sweetness of the white chocolate. Allow ganache to cool. Place a piece of clingfilm over the bowl and press onto the surface of the ganache. Refrigerate ganache till firm.

Shaping matcha white chocolate ganache balls: When ganache is firm, use a melon baller to scoop out rounded (slightly heaped) portions onto a tray lined with baking paper. Return to refrigerate these portions for 10 minutes or till firm. Using the disposable food gloves, roll the portions into round balls. Refrigerate for another 10 minutes or till firm.

Coating ganache balls with white chocolate: Melt remaining 120g white chocolate in another heatproof bowl using the double boiler method on low heat. Using the tines of 2 fork, dipped the round ganache balls into the melted white chocolate to coat. Lift the dipped ganache ball up from the melted white chocolate. Rotate and transfer the coated balls at the same time between the 2 fork to ensure ganache balls are well coated all around. Transfer coated ganache balls to a tray lined with baking paper. While chocolate coating is still soft, sprinkle a pinch of matcha powder randomly on top of each coated ganache ball. Allow the white chocolate coating to set at cool room temperature. Alternatively, refirgerate coated ganache balls untill firm.

Storing chocolate truffles: Line truffles with mini cupcake papers and store truffles at cool room temperature covered or in the refrigerator for several days. Serve truffles at room temperature, not chilled and directly from the refrigerator to enjoy the flavour.

Notes:
1) It takes some practice to melt white chocolate. White chocolate has to be melted using low heat over a double boiler and constantly stirred gently. If the water in the double boiler comes to a strong boil, the heat may cause the white chocolate to burn. Burnt white chocolate is dry and cannot be melted anymore. From experience, white chocolate is the hardest to melt among all chocolates.

2) As an alternative, roll the ganache balls onto matcha powder. It will work fine too.

3) Another alternative would be to roll the ganache balls onto grated white chocolate. This was the intention in the book by Dede Wilson

Friday, May 21, 2010

Art of The Chocolate Tart


These days, tarts are fast becoming part of my baking routine. With some leftover cream from a previous bake, I decided to churn out some chocolate tarts.


Flipping through my collection of bake books, I decided to marry two recipes from two different books. Instead of making a whole 10 inch tart, I thought it would be nice to tweak things a little. Why not make smaller tarts instead? Well, it seemed pretty straight forward, but there is slightly more work involved in making smaller tarts. I have to measure out the exact weight of dough for each small tart tin and press the dough in to fit. The recipe made enough for 13 tarts, meaning that I had to repeat the pressing dough into tart tin process 13 times. I would not say it is difficult to do so, but the repetitive nature is enough to bore me. What a chore!

Next up was deciding the amount of chocolate filling for the tarts. I made a small portion and it was sufficient to fill 6 of the tart crusts. After filling the 6 tart crusts, I soon realized that the filling was too bitter for my liking. What I did next was prepared enough filling for the rest of the tart crusts. I then scooped out the fillings from the tarts I have already prepared and mixed them in with the rest of the newly prepared filling, added some honey and it was good to go.


Silky Chocolate Tarts (Crust recipe adapted from Tarts: Sweet and Savoury)
Equipment: 3 inch (measured from top) individual tart tins. Mine comes in a pack of 12.

Pate Sucree:
200g flour
60g icing sugar
85g diced unsalted butter, softened and at room temperature
2 egg yolks
1/2 tsp vanilla extract
2 tbs iced water

Method:
1) Sift flour and sugar into a bowl. Use a whisk to distribute the ingredients evenly.
2) Pour the flour and sugar mixture onto a clean surface. Make a well in the middle.
3) Place the butter, egg yolks and vanilla in the well. Use one hand to peck the butter and yolks together until it becomes like scrambled eggs
4) Using a long palette knife, spoon flour over the well and chop throughout to mix the butter mixture and the flour mixture. The end result should be lumpy.
5) Add the iced water and continue chopping with the knife.
6) Using both hands, bring the mixture to a ball of dough.
7) Wrap it in clingfilm and allow dough to chill for 45 minutes.
8) Preheat oven to 180 degrees C
9) When dough is chilled, weight 30g dough for each tart tin. Press dough evenly to fit the tins.
10) Chill dough for 20 minutes before baking.
11) Place a piece of baking paper over the top of the tart tins. Fill with baking beans or dry beans/ raw rice. Place in oven and bake for 10 minutes.
12) Remove baking paper and baking beans and return tart crusts to oven and bake a further 10 - 15minutes till crusts are dry.
13) Allow crusts to cool and remove from tart tins when done.

Silky Chocolate Filling:
225ml cream
180g dark chocolate (50 - 60% cocoa)
1 tbs liquer of choice: Bailey's, Rum, Cointreau, Kahlua will do fine.
2 - 4 tbs corn syrup/ honey (start with 2 tbs, add more if desired)

Method:
1) Heat cream in a heatproof bowl over a double boiler. When cream is hot, add the chocolate. Allow chocolate to soften then stir to allow chocolate and cream to combine.
2) Remove bowl from heat. Stir in corn syrup and liquer. Allow chocolate filling to cool
3) Spoon chocolate filling into individual tart crusts. Chill tarts in fridge until filling is set.

Sunday, April 4, 2010

Cake Project - Awfully Chocolate Banana Cake!


It was a major cake making project that required several hours of committment which served one purpose - a birthday cake for my younger brother. As the name suggests, there is an awful lot of chocolate present in this cake. Layers of chocolate sponge sandwiched with chocolate mousse and fresh bananas finally glazed on the exterior with a lava of chocolate ganache. Awfully sinful indeed!

Once again, credit goes to aunty yochana whose blog I referred to for the wonderful recipe. My previous attempts on egg tarts and pandan kaya cake which came from her library of recipes churned out delicious treats and I was so looking forward to this recipe.

The process of making the cake was a tedious and a not-so-smooth-sailing one. I had some problems making the mousse and the chocolate ganache. The mousse turned out lumpy on the first attempt and I had to chuck the whole thing in the bin. As for the chocolate ganache, everything turned grainy and yucky. Once again, the bin was revisted a second time. There goes my cocoa powder! In the end, I settled for a chocolate butter glaze found on allrecipe as I had ran out of cream.

Decorating the whole cake wasn't an easy affair either. The standing chocolate pieces that circle the cake's perimeter are known as cat's toungue. It was an idea borrowed from a chocolate book that I came across in the library. To do the cat's toungue, I melted chocolate and smeared them onto a piece of greaseproof paper into oblong shapes slightly longer than the height of the cake using a spatula. The melted choclate is then left to harden. I then placed the cat's tongue in my room with the air-conditioner on to set them faster. When left in warm humid conditions, the chocolate pieces will soften and will not hold their shape well. My cat's tongue actually softened and curved outwards from the cake instead of staying upright when I left it on the dining table!

On top of the cake is six piece of square wafer biscuit truffles. Instead of the usual truffles with molten ganache centers, I bought a pack of loackers square chocolate wafers and dipped them in white chocolate. The sqaures were then piped with dark chocolate to give the truffles a finishing touch. The easiest part of all was the piping of words using white chocolate. Tada! My chocolate banana cake was completed.

My family was pretty supportive of the cake. Everyone had a huge slice. Six of us took more than half the cake and it was disappeared without a trace just the next day! Next time I shall double the volume of the chocolate mousse and use a sweeter ganache to coat the entire cake. Yummy!

The recipe can be found from Aunty Yochana's blog:
Awfully chocolate banana cake recipe
Related Posts with Thumbnails